All the bank transactions can be monitored in the “Cash and Bank Account” menu. Click the specific bank account you want to monitor and view the transactions (see below).
Recent transactions are on top and below the transactions monitor is the listing of uncleared checks issued for this specific bank account. Click the Status button and change status to “Cleared” if the check really cleared with the bank.

Click to zoom the slideshow and view the procedures.
[/et_pb_toggle][et_pb_toggle admin_label=”3. Post Bank Deposits (Toggle)” _builder_version=”3.0.49″ title=”3. Post Cash and/or Check Deposits” open=”off” open_toggle_text_color=”#34b59f” border_style=”solid” background_position=”top_left” background_repeat=”repeat” background_size=”initial” icon_color=”#ef5555″ closed_toggle_text_color=”#070707″ title_font_size=”20″ use_border_color=”on” border_color=”#34b59f”]
 [/et_pb_toggle][et_pb_toggle admin_label=”4. Post Fund Transfers (Toggle)” _builder_version=”3.0.49″ title=”4. Post Fund Transfers” open=”off” open_toggle_text_color=”#34b59f” border_style=”solid” background_position=”top_left” background_repeat=”repeat” background_size=”initial” icon_color=”#ef5555″ closed_toggle_text_color=”#070707″ title_font_size=”20″ use_border_color=”on” border_color=”#34b59f”]


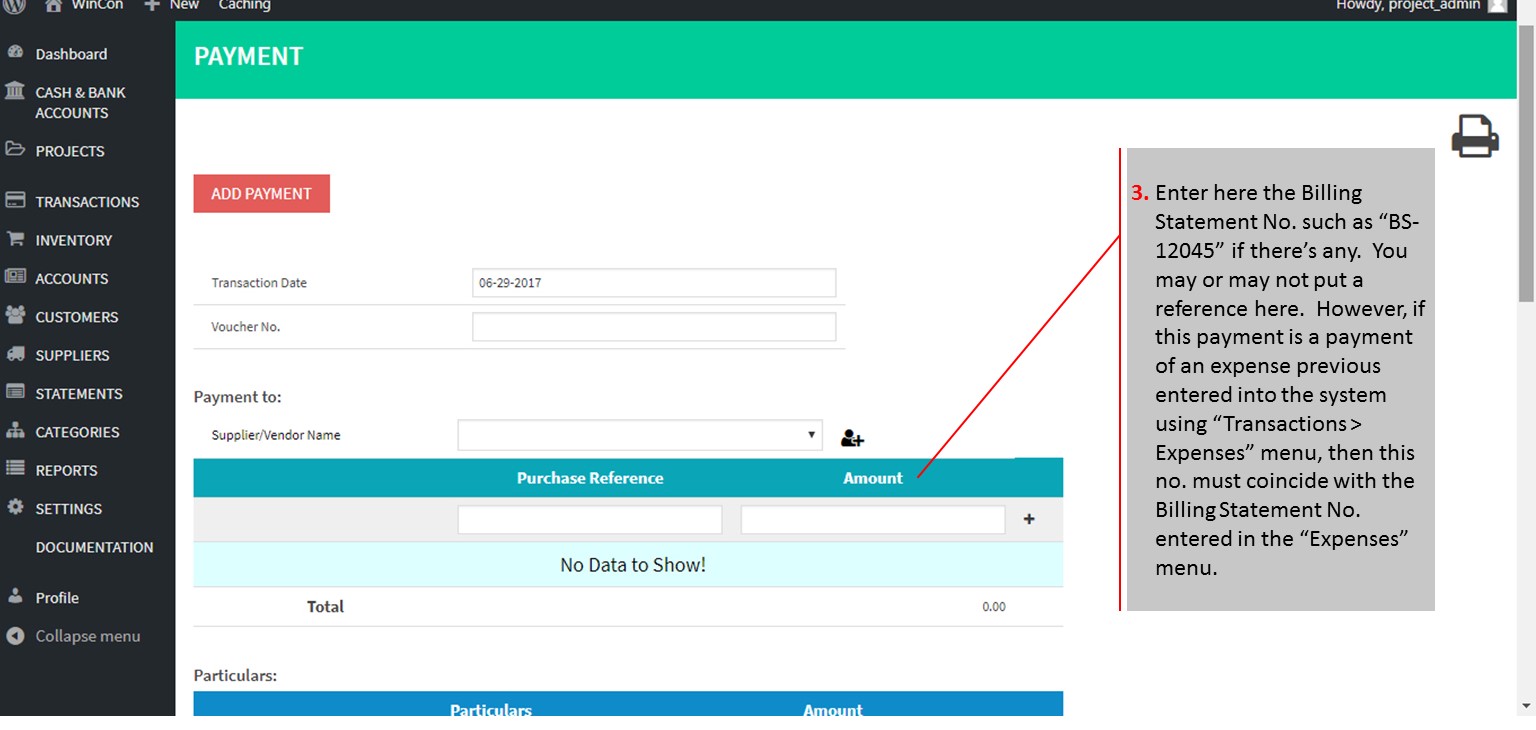


Download the sample printable form of the Payment Voucher for printing. The sample form was set to match the print settings of the system. Put in the logo of your company, address and maybe some foooter content and have it printed with your printing press prenumbered.
[/et_pb_toggle][et_pb_toggle admin_label=”5. Post Check Encashments (Toggle)” _builder_version=”3.0.49″ title=”5. Post Check Encashments” open=”off” open_toggle_text_color=”#34b59f” border_style=”solid” background_position=”top_left” background_repeat=”repeat” background_size=”initial” icon_color=”#ef5555″ closed_toggle_text_color=”#070707″ title_font_size=”20″ use_border_color=”on” border_color=”#34b59f”]
Click to zoom the slideshow and view the procedures.
Click to zoom the slideshow and view the procedures.
Click to zoom the slideshow and view the procedures.
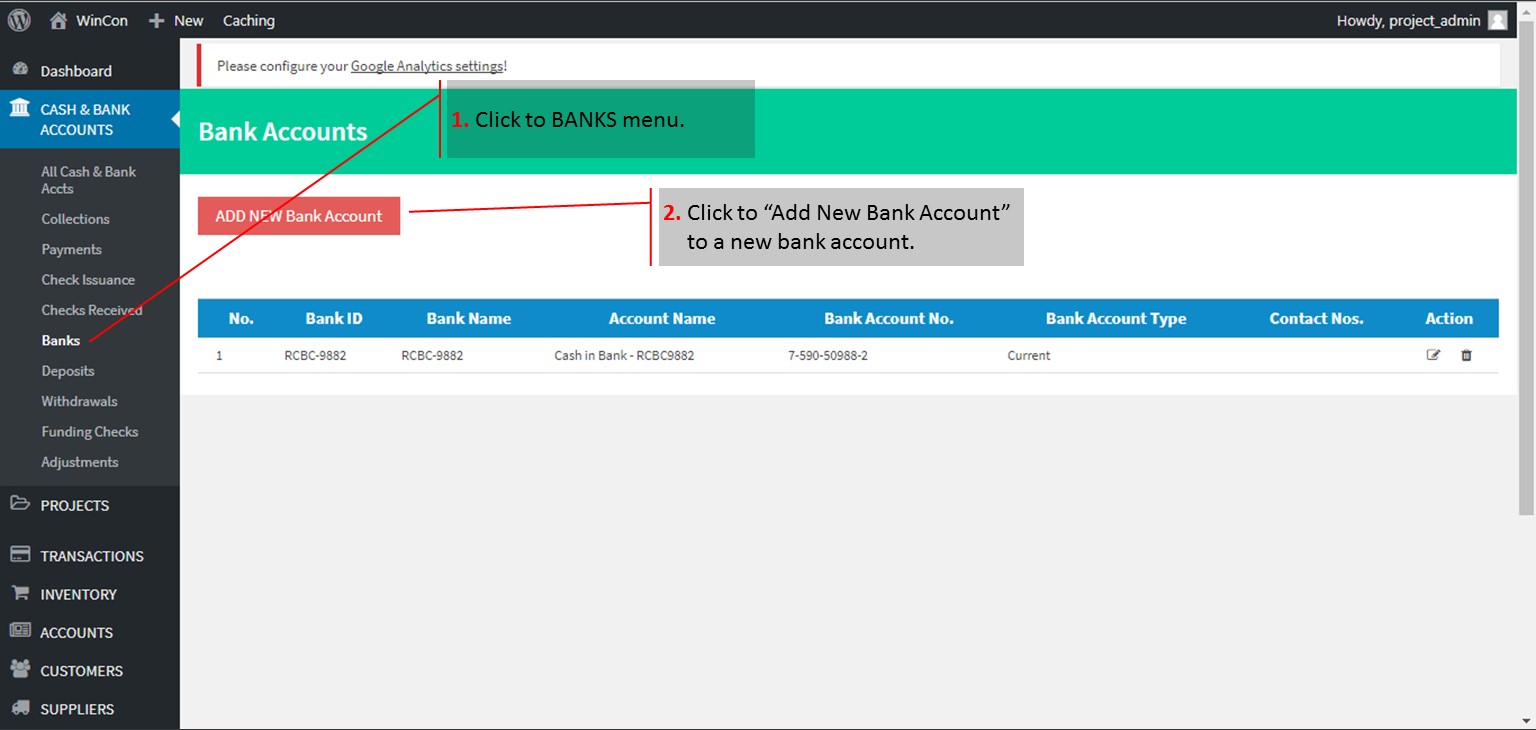
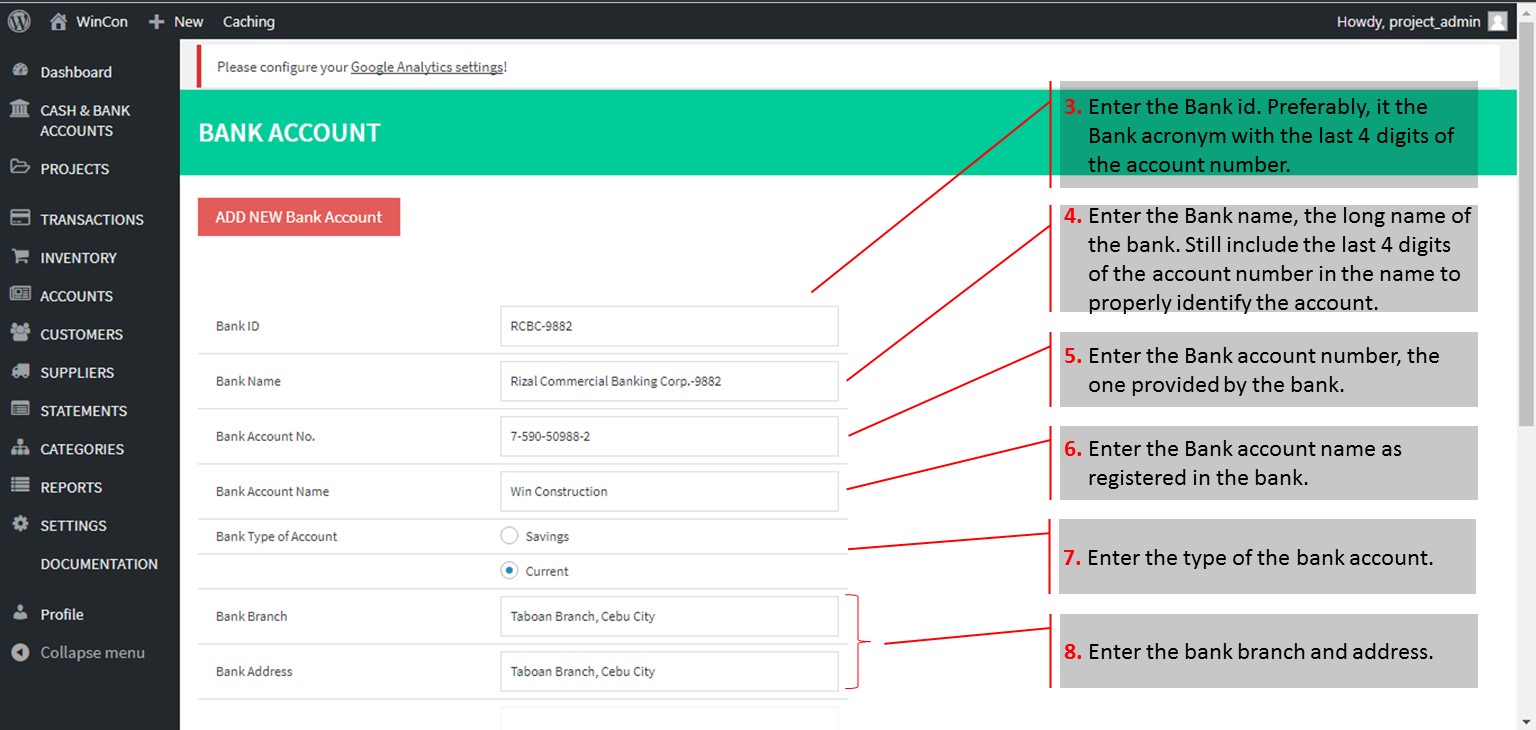
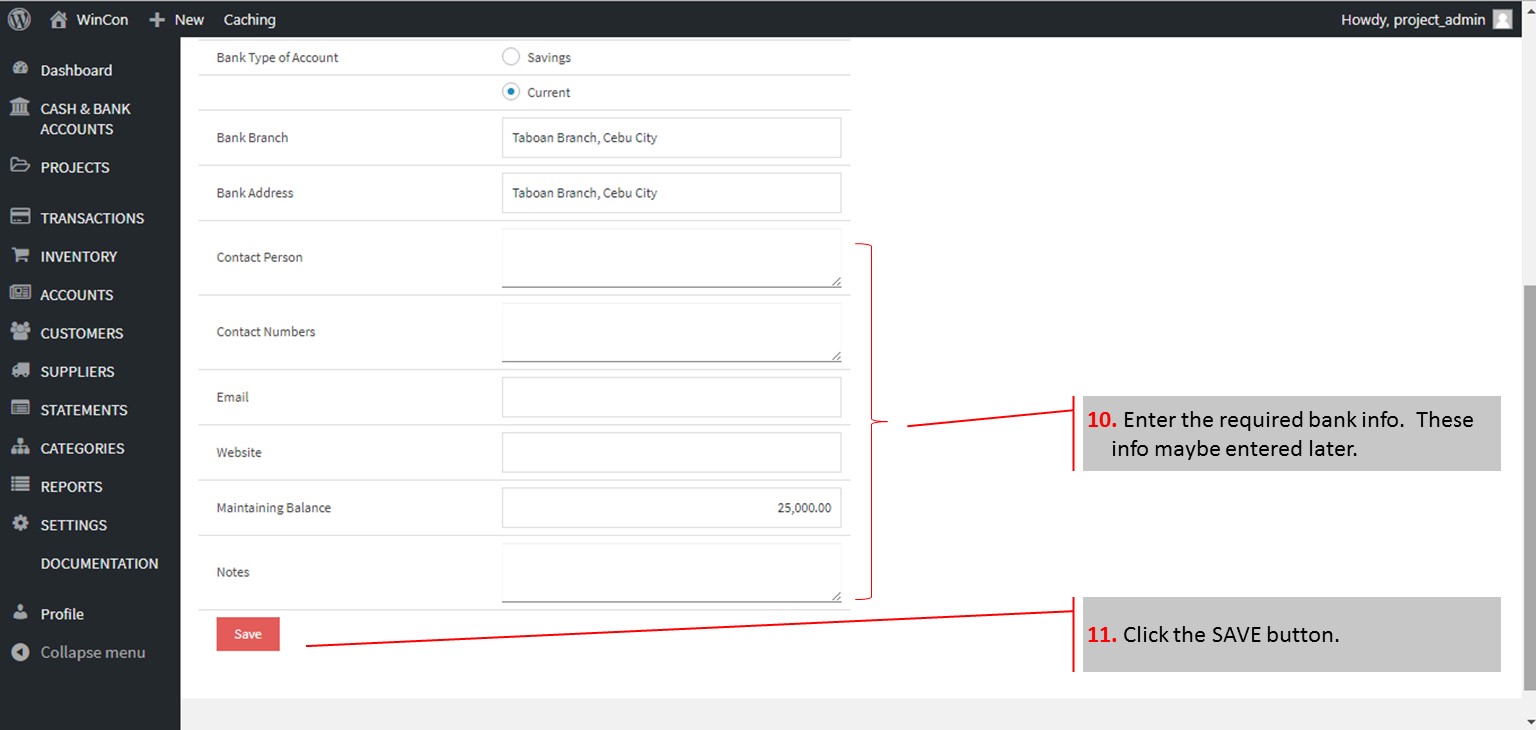
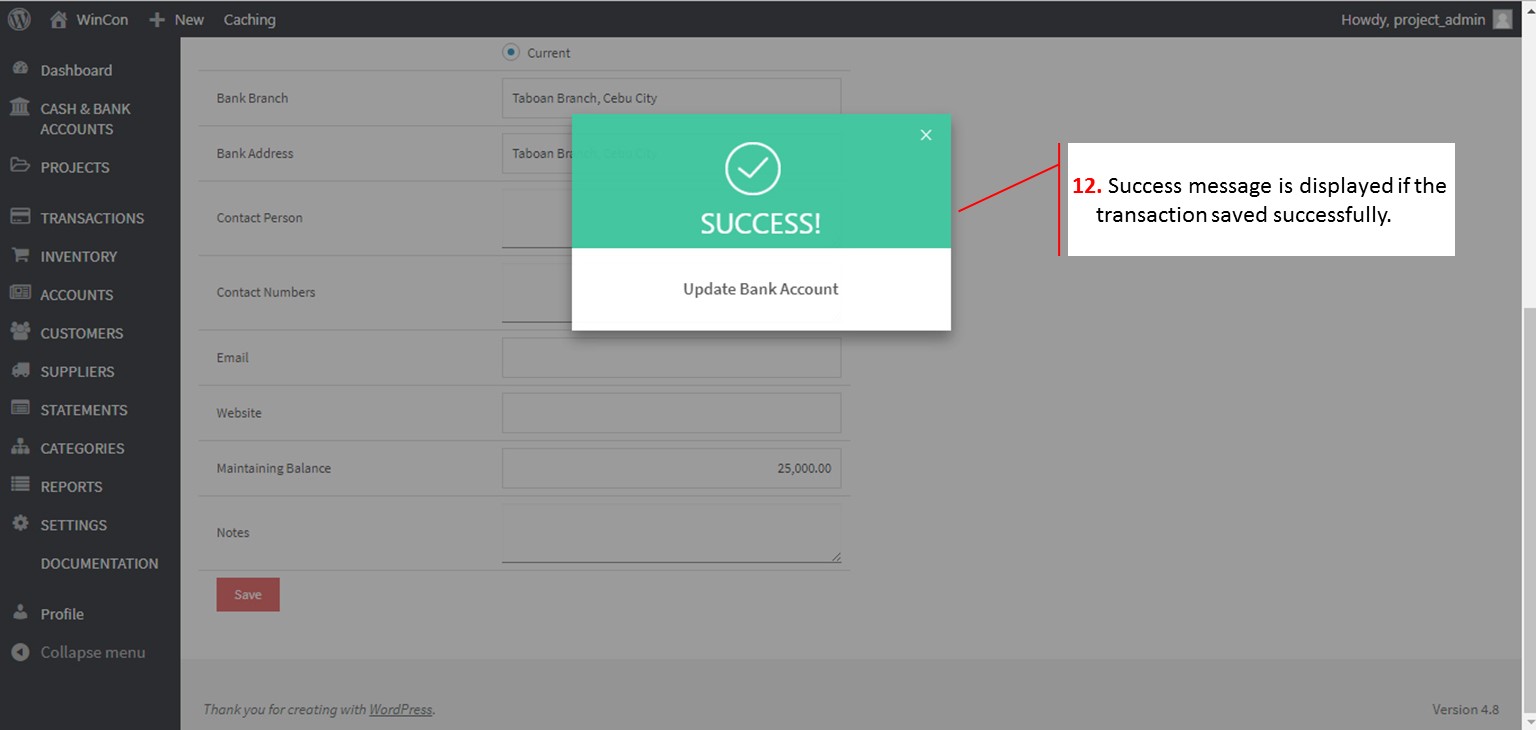
How to Setup a Bank Profile
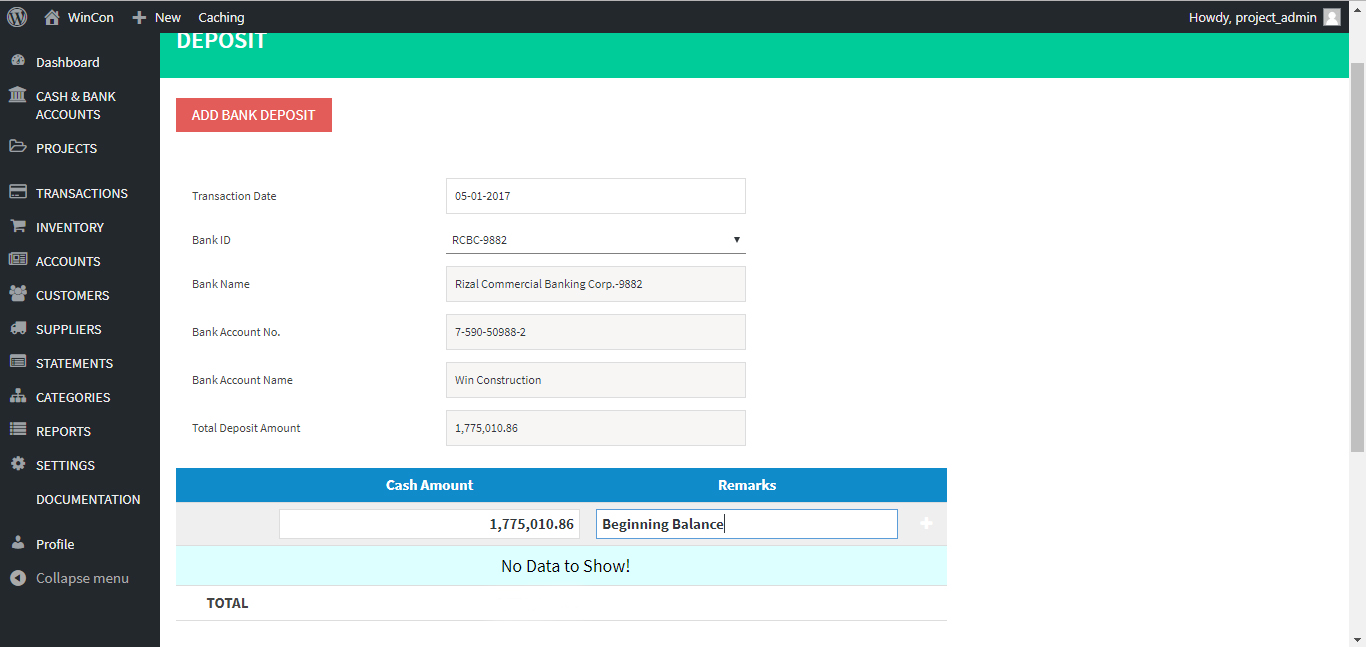
Go to Deposit menu
Click “Add New Deposit”.
Enter the amount setup as beginning balance in the Cash section of the deposit menu.
Enter “Beg. Balance” in the Remarks section.
Click SAVE button.
Record first the Check Issuance by:
Go to Check Issuance menu.
Click the “Add a New Check Issuance” button
Enter Check details.
Click SAVE button.
Once the new check issuance is saved, go to “All Check Issuances”.
Find the check for encashment using the check details.
Set the check to “Cleared” by clicking on the Uncleared “Status” and click the Cleared button on the popup dialog, and the indicate the date the check was encashed or cleared.
Click this link: How to post Payment
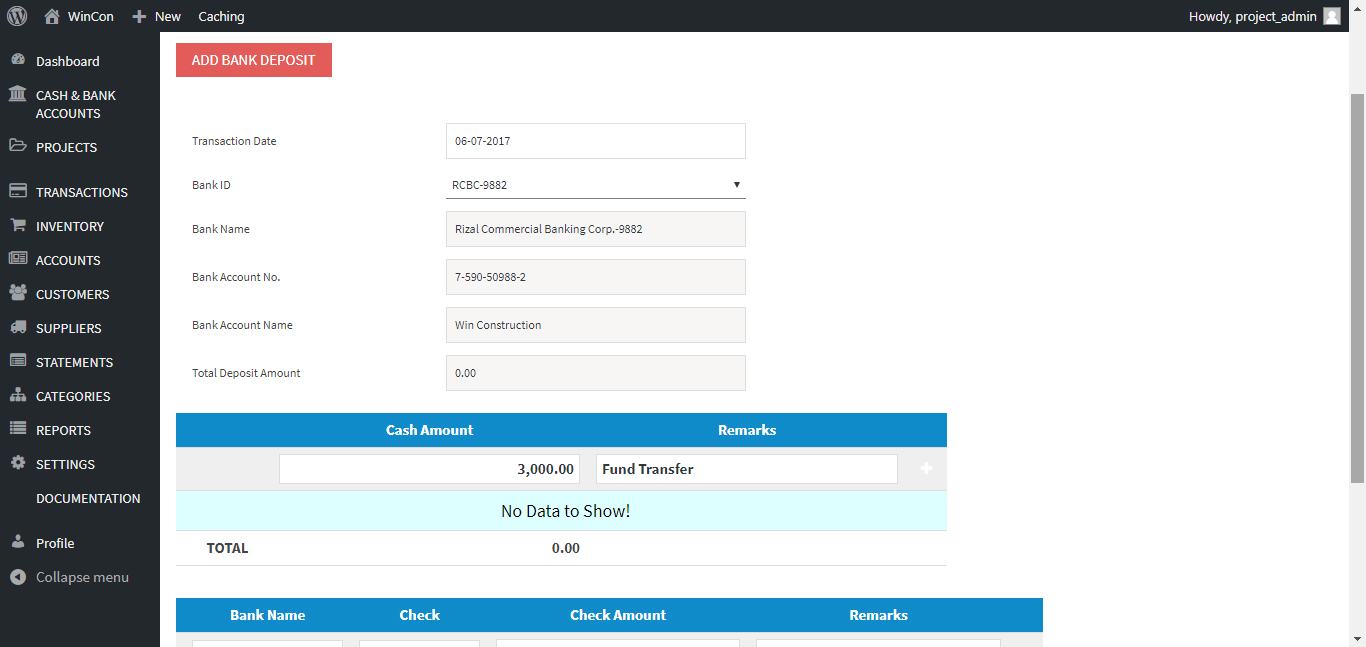
Go to Deposit menu
Click “Add New Deposit”.
Enter the amount of cash deposit in the Cash section of the deposit menu or check amount In the Check Section.
Enter “notes or remarks” if any, in the Remarks section.
Click SAVE button.
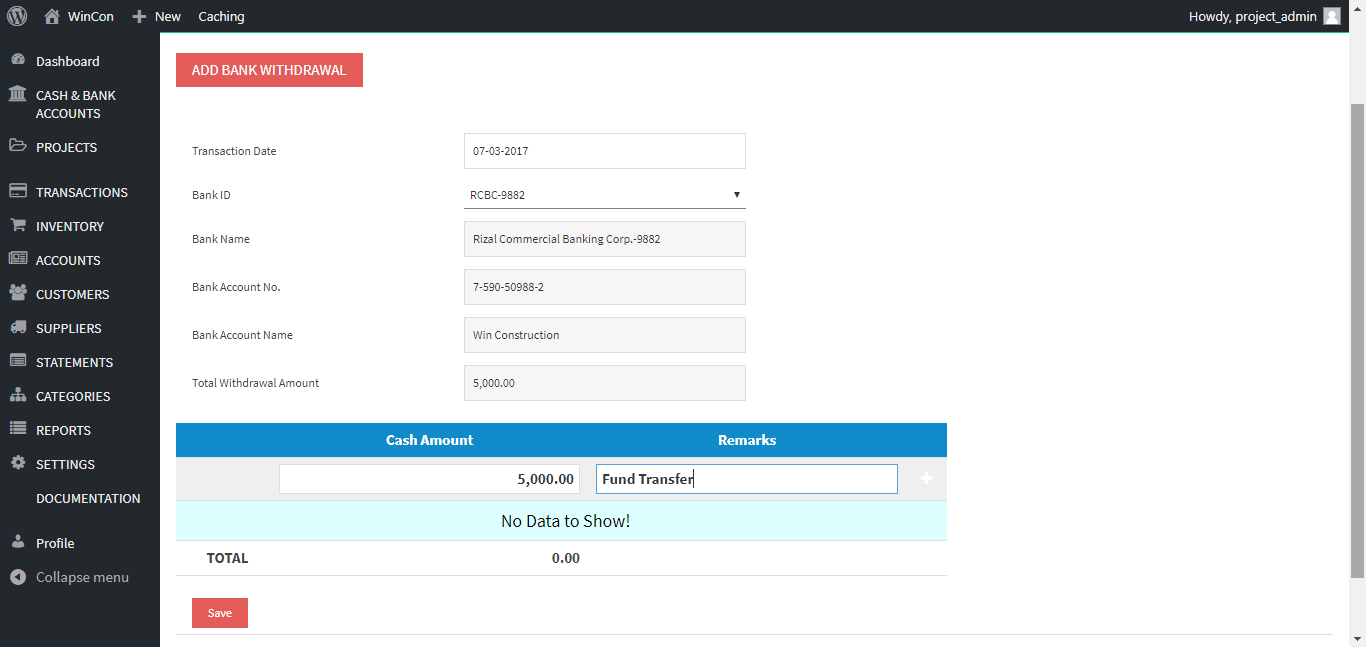
The Withdrawal menu is for Cash withdrawal only. This menu is good for Savings bank account.
Withdrawal on checking accounts is done via a check issuance.
When this happens, go to Step 4 and follow instructions on “How to post check issuance or payments.”
[/et_pb_text][/et_pb_column][et_pb_column type=”1_4″][/et_pb_column][/et_pb_row][/et_pb_section]
Deposits may be in CASH or in CHECK.
All checks for deposit must have been encoded as “Check Received” before in can posted as “Deposit” in the system. The checks received can be posted in the system via the Transactions > Sales menu or via Cash and Bank Accounts > Checks Received.
[/et_pb_text][/et_pb_column][et_pb_column type=”1_4″][/et_pb_column][/et_pb_row][/et_pb_section]
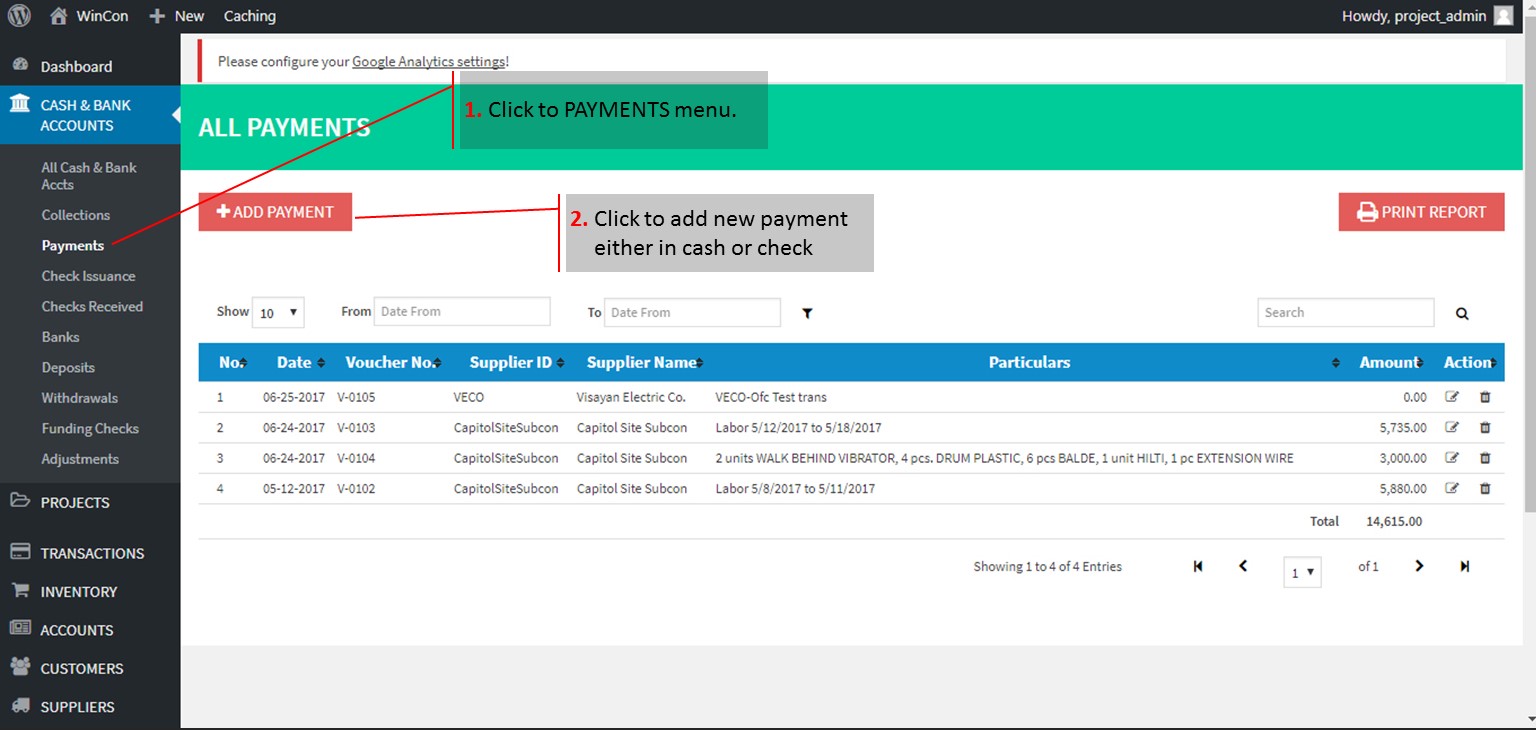
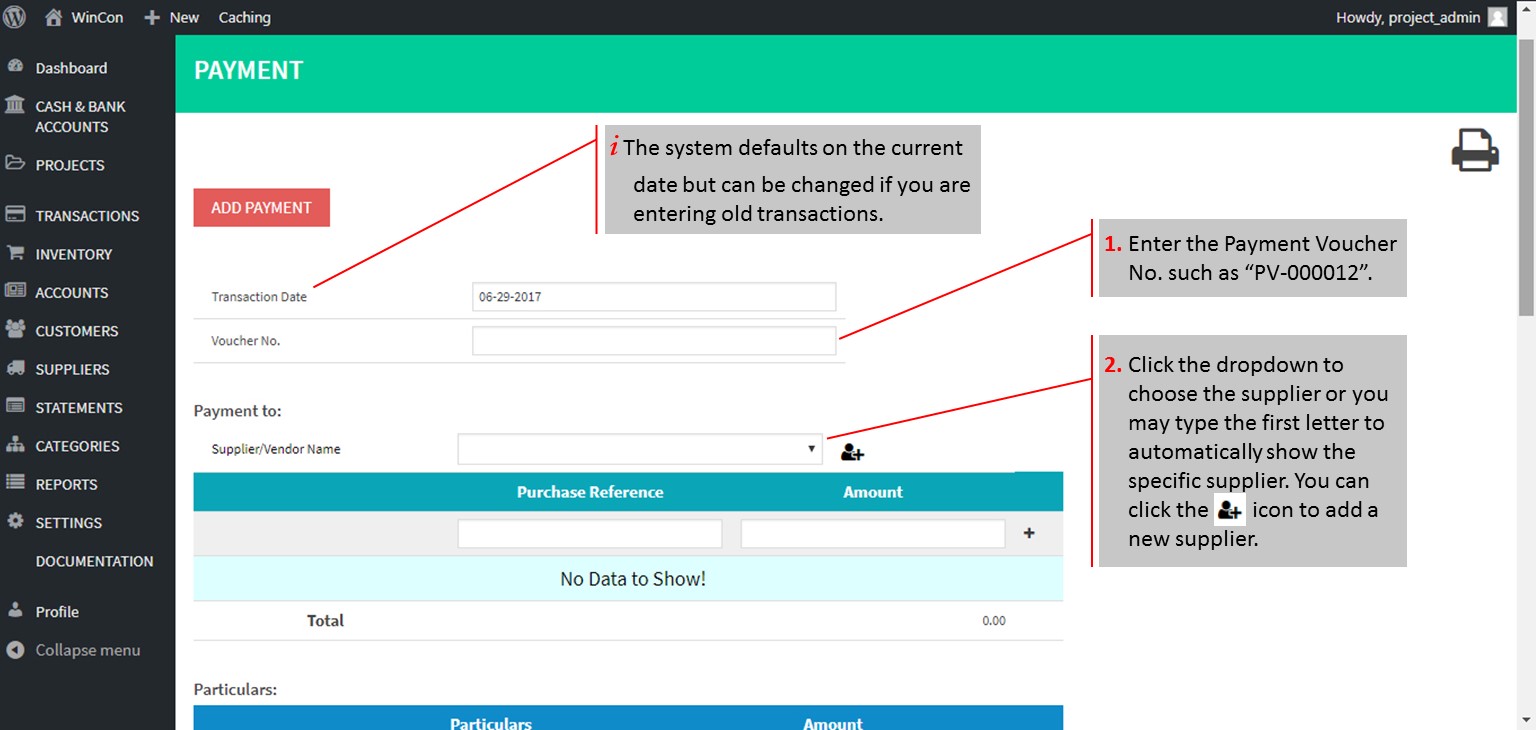
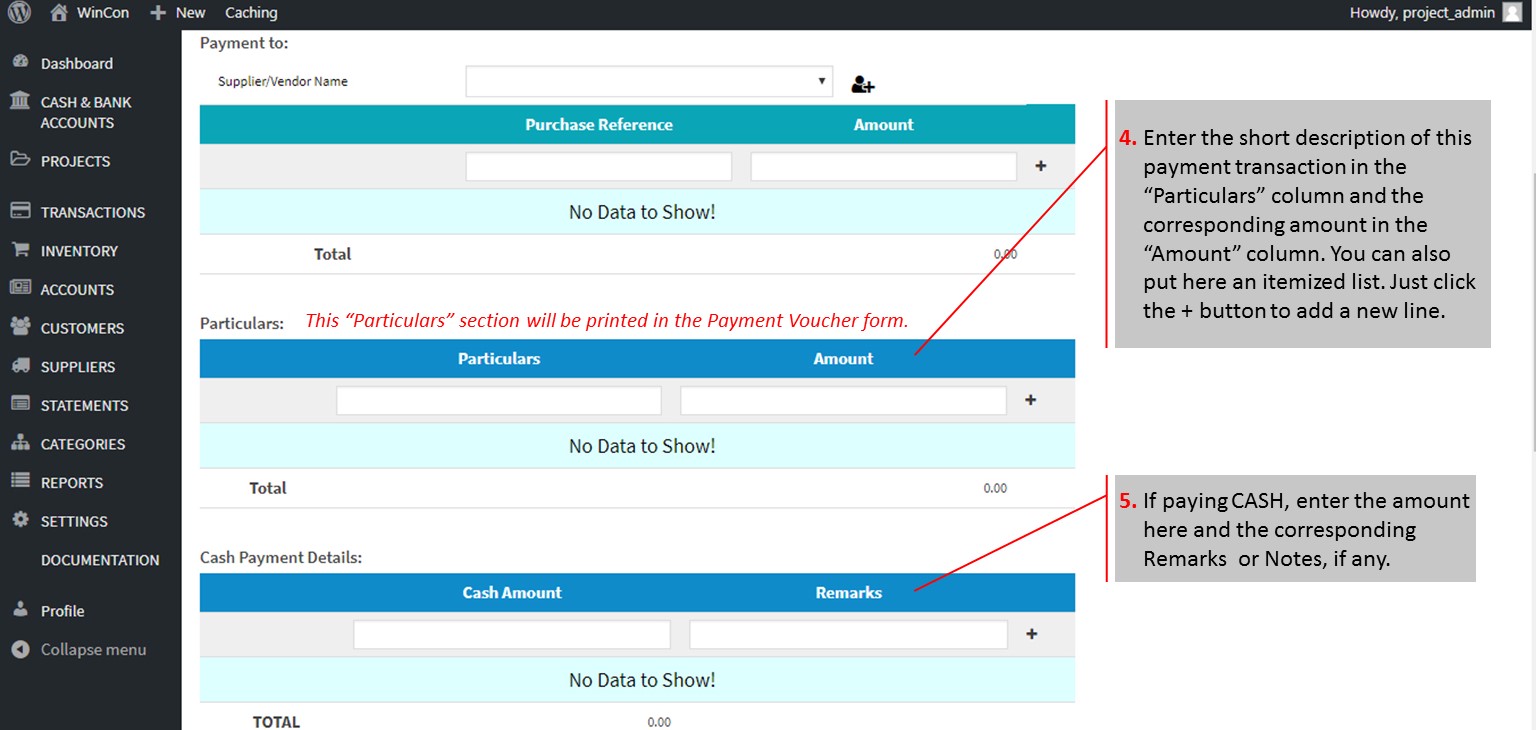
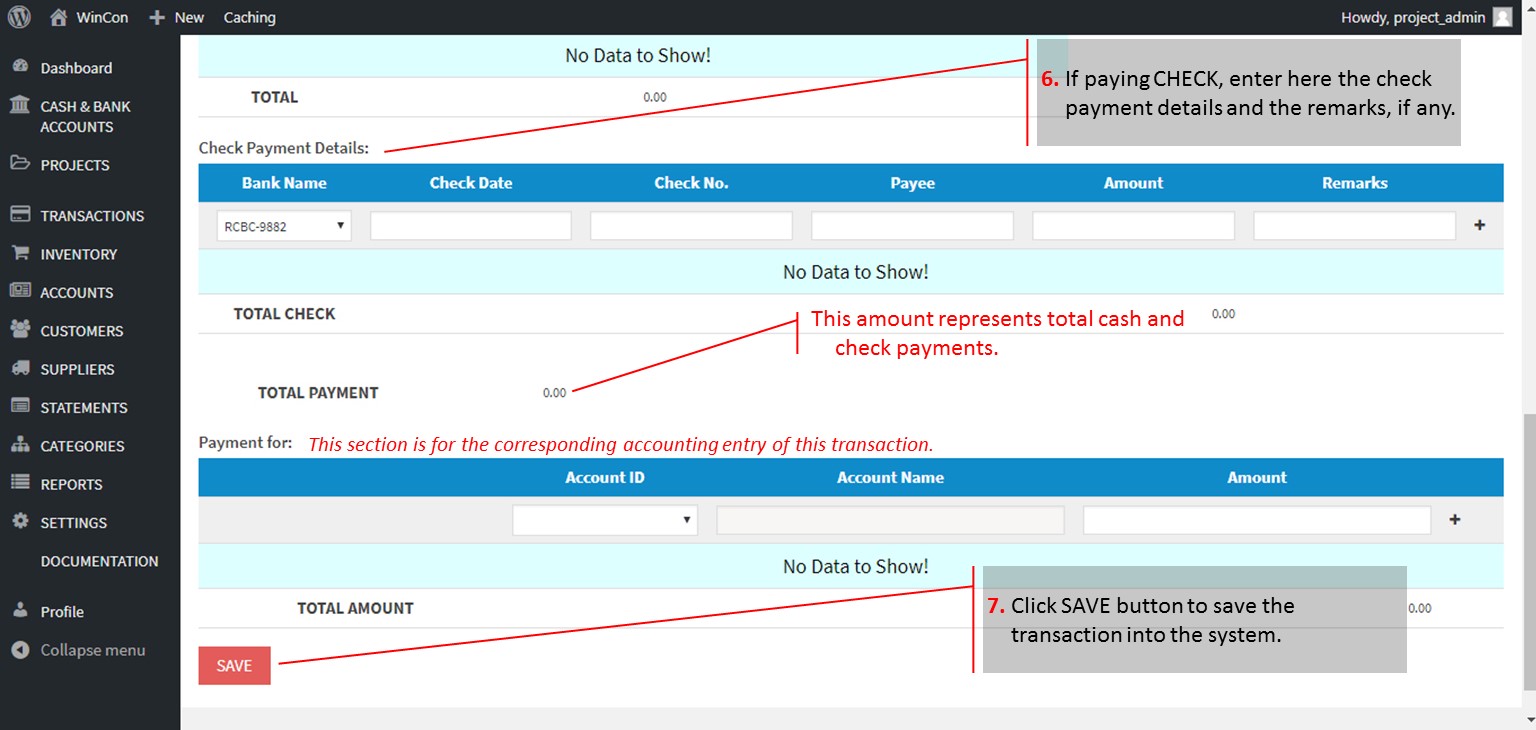
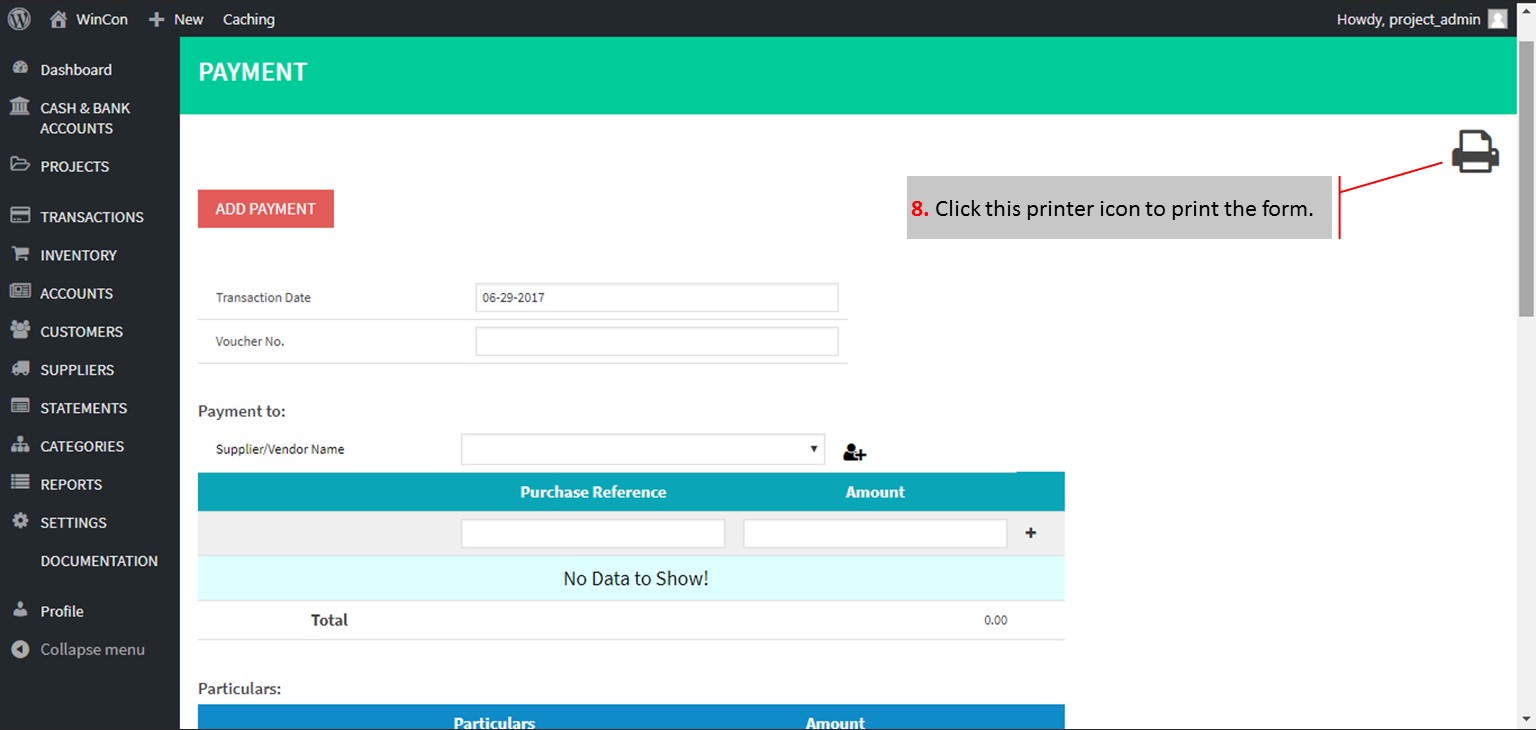
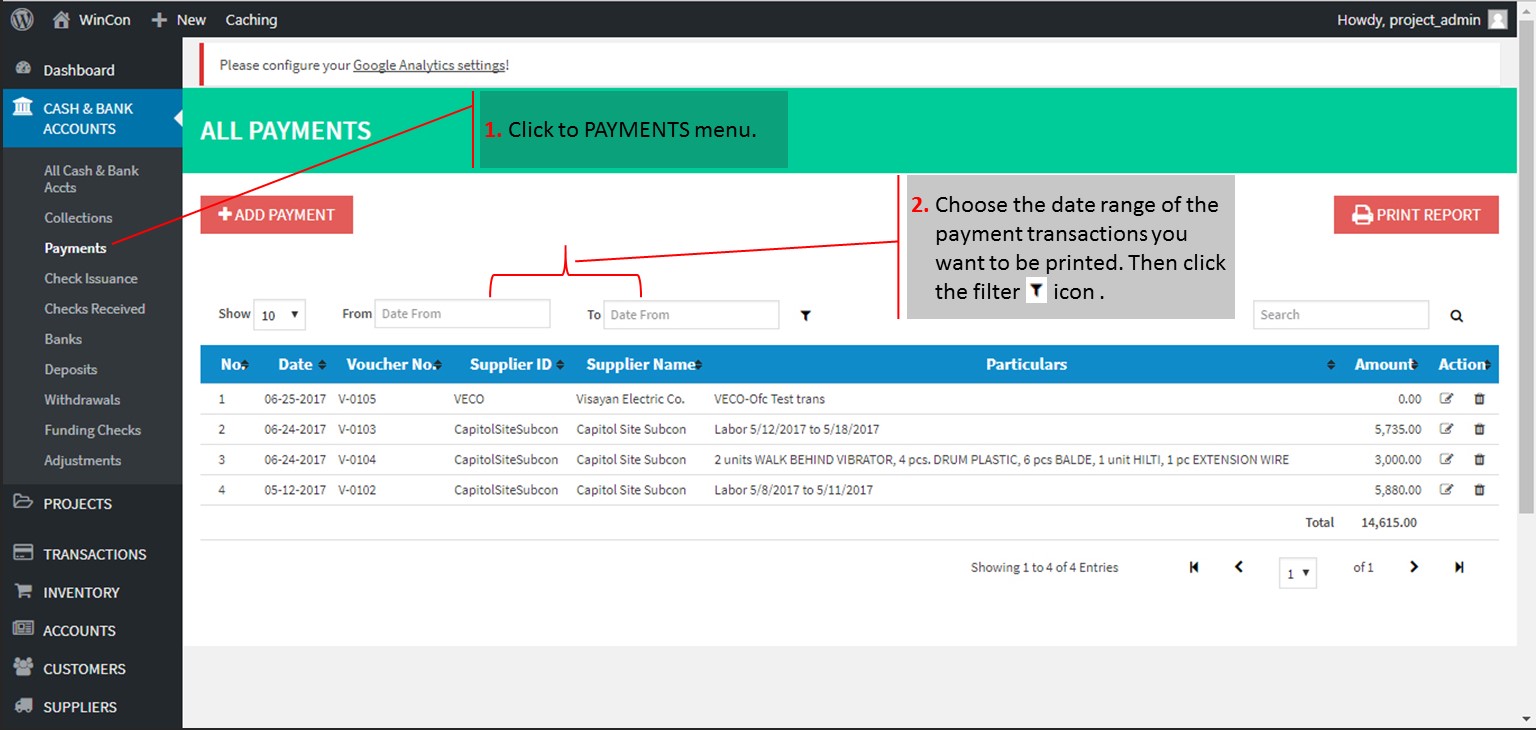
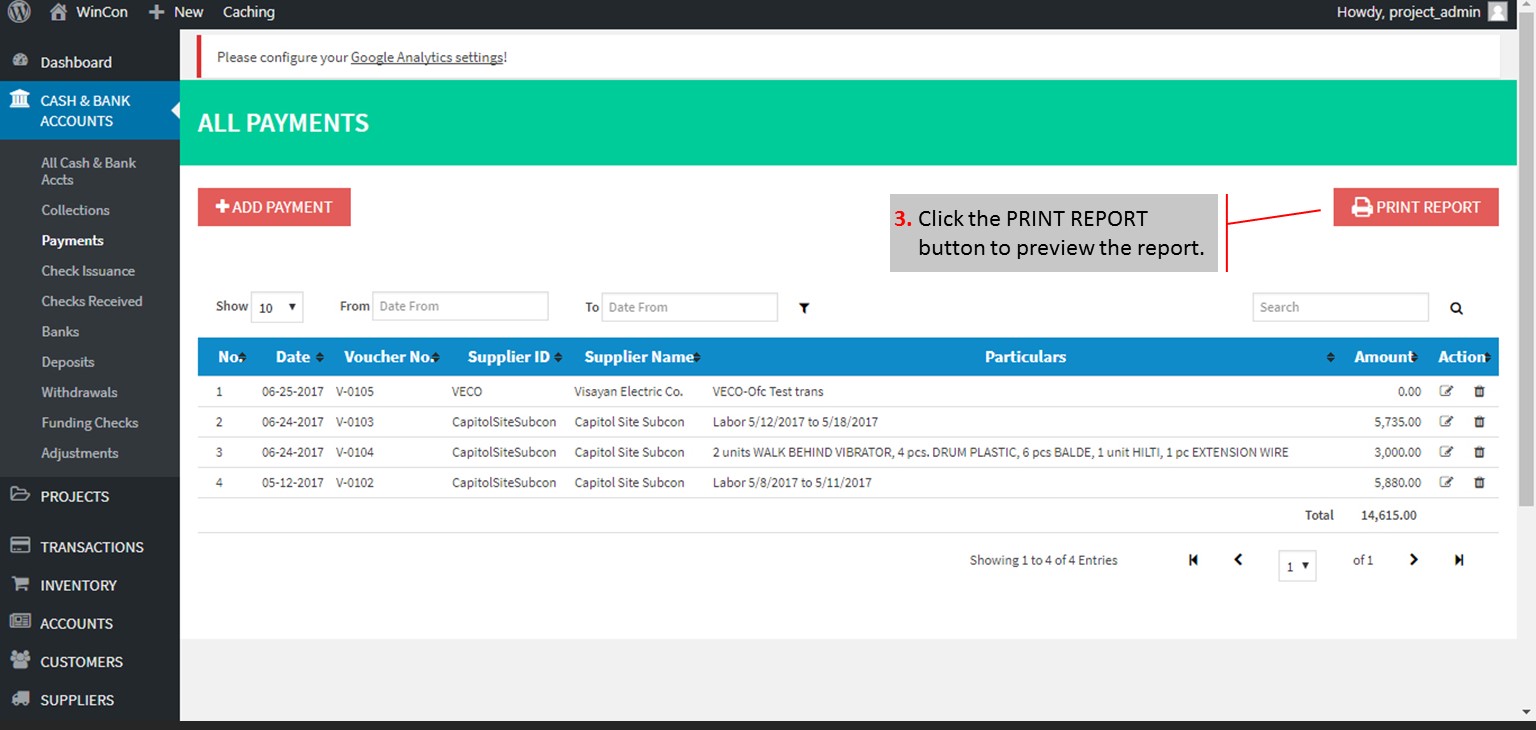
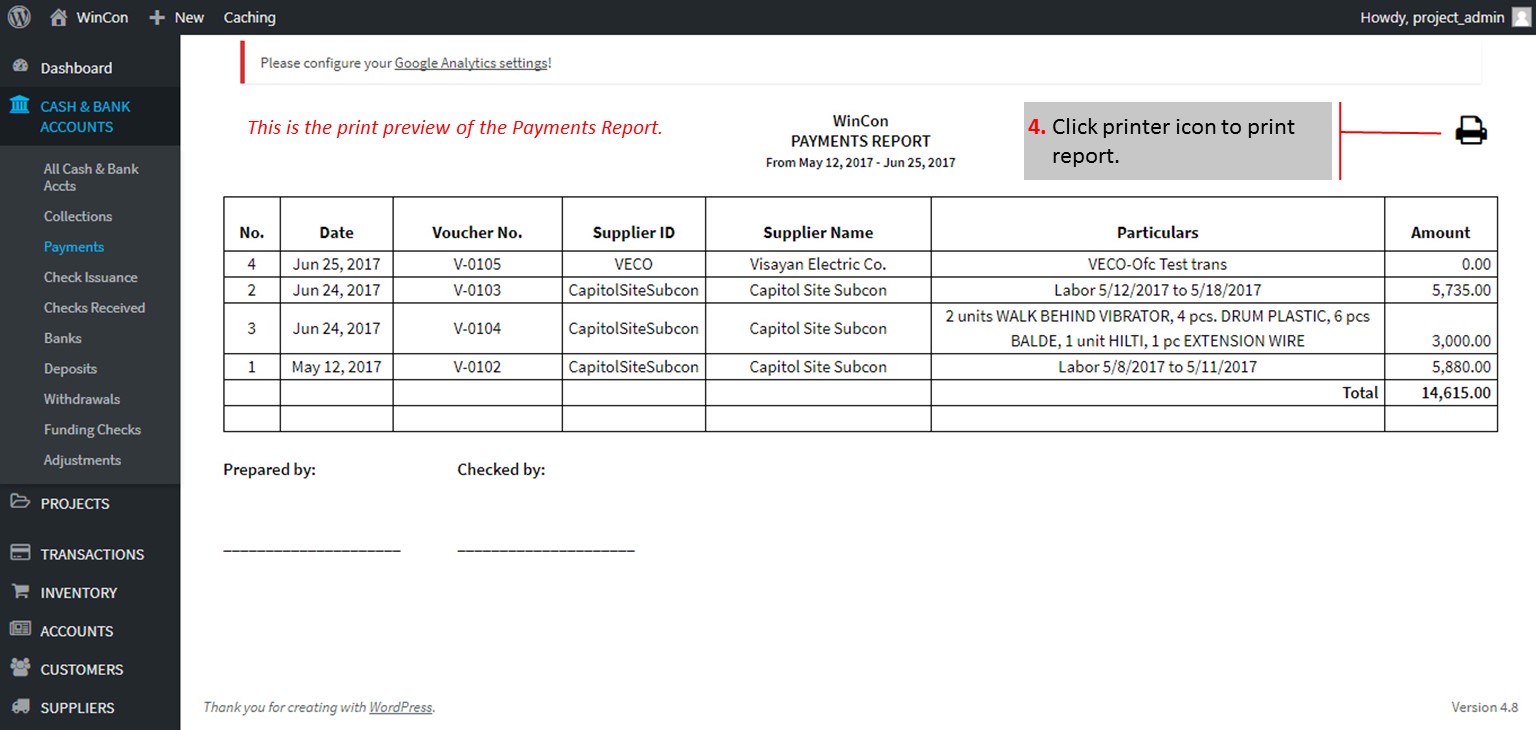
Here’s the procedure on how to post payment into the system: Click to zoom the slideshow.

[/et_pb_tab][et_pb_tab title=”How to Print Payment Reports” use_background_color_gradient=”off” background_color_gradient_start=”#2b87da” background_color_gradient_end=”#29c4a9″ background_color_gradient_type=”linear” background_color_gradient_direction=”180deg” background_color_gradient_direction_radial=”center” background_color_gradient_start_position=”0%” background_color_gradient_end_position=”100%” parallax=”off” parallax_method=”on” background_size=”cover” background_position=”center” background_repeat=”no-repeat” background_blend=”normal” allow_player_pause=”off” tab_font_select=”default” tab_font=”||||” body_font_select=”default” body_font=”||||” body_line_height=”2em” body_line_height_tablet=”2em” body_line_height_phone=”2em”]
[/et_pb_tab] [/et_pb_tabs][/et_pb_column][et_pb_column type=”1_4″][/et_pb_column][/et_pb_row][/et_pb_section]